
Create A Wood Picture Frame
by : Steve Patterson, Photoshop Essentials.com

In this Adobe Photoshop tutorial, we're going to learn how to easily create a simple wood picture frame using a layer mask, a couple of layer styles, and one of Photoshop's built-in patterns!
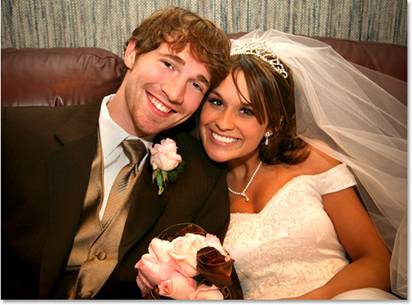
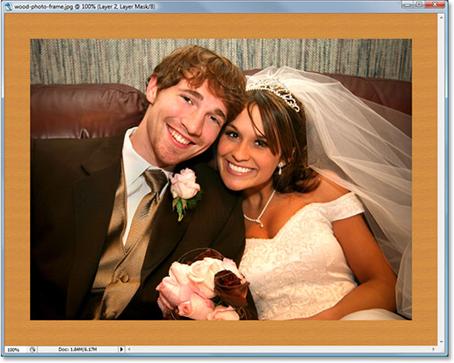
Here's the image I'll be using for this Photoshop tutorial:
Let's get started!
Step 1: Duplicate The Background Layer
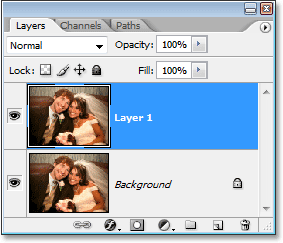
The first thing we need to do to create our picture frame is duplicate our Background layer. The Background layer is the layer which contains our original image, and if we look in our Layers palette, we can see that it's currently the only layer we have:

Photoshop Effects The Layers palette in Photoshop showing the image on the Background layer.
Let's duplicate the layer using the handy keyboard shortcut, Ctrl+J (Win) / Command+J (Mac). If we look back in our Layers palette, we can see that we now have a copy of the Background layer, which Photoshop has named "Layer 1" for us, above the original:
Photoshop Effects Press "Ctrl+J" (Win) / "Command+J" (Mac) to duplicate the Background layer.
Step 2: Add Extra Canvas Space Around The Image
We need to add some extra space around our photo. The extra space is going to become our picture frame. The amount of space you add depends on how large you want your frame to be. Go up to the Image menu at the top of the screen and choose Canvas Size. When the Canvas Size dialog box appears, enter how much space you want to add around the image. I want a fairly thick frame for my photo, so I'm going to enter a value of 1.5 inches for both the Width and Height options. Make sure you have the Relative option checked as well:
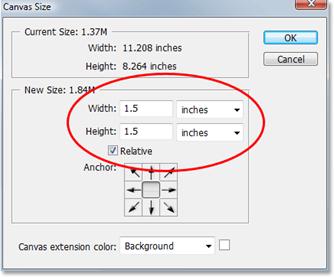
Photoshop Effects Enter the amount of canvas space you want to add around the image. Here, I'm adding 1.5 inches of space for both the Width and Height.
Click OK in the top right corner of the dialog box to exit out of it and have Photoshop add the extra canvas space. You'll see the extra space appear around your photo in your document window:
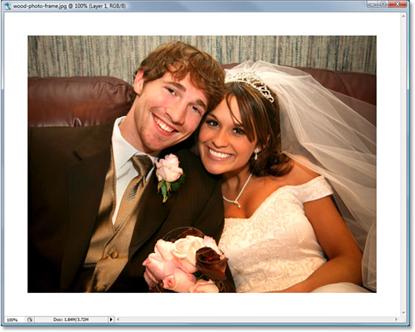
Photoshop Effects The extra space now appears around the photo in the document window.
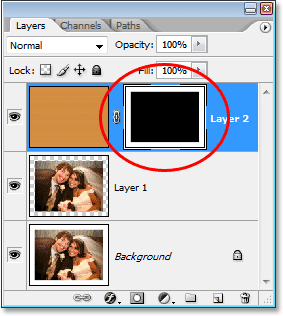
Step 3: Add A New Blank Layer
Next, we need to add a new blank layer above our two existing layers. With "Layer 1" (the top layer) selected, click on the New Layer icon at the bottom of the Layers palette:
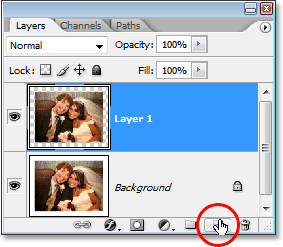
Photoshop Effects Click on the "New Layer" icon at the bottom of the Layers palette to add a new blank layer to the document.
Nothing happens in the document window, but we can see in the Layers palette that Photoshop has added a new blank layer for us and gave it the descriptive name "Layer 2":
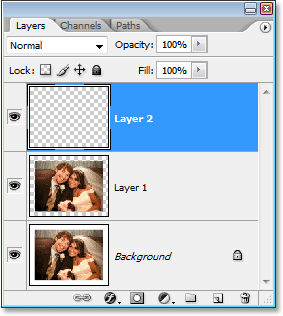
Photoshop Effects A new blank layer appears in the Layers palette above the other two layers.
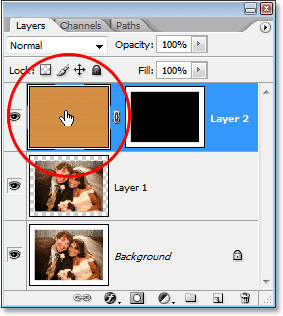
Step 4: Fill The New Layer With Photoshop's Wood Pattern
To make our frame look as if it's made out of wood, we could go through the hassle of creating our own wood texture, but we don't need to since Photoshop comes with a wood pattern already built in! With "Layer 2" selected, go up to the Edit menu at the top of the screen and choose Fill. You can also use the keyboard shortcut, Shift+F5. Either way brings up the Fill dialog box. For the Contents option at the top, choose Pattern from the drop-down menu to the right of the word "Use". Then click on the little pattern thumbnail to the right of the words Custom Pattern and select the Wood texture from the selection box that appears (it's the fourth one from the left, top row):
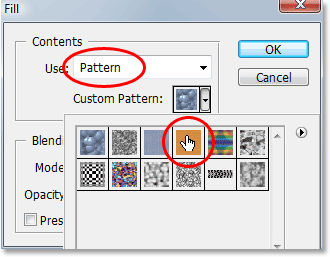
Photoshop Effects In the "Fill" dialog box, set the "Contents" to "Pattern" and select Photoshop's built-in wood texture from the selection box.
Then, in the Blending section in the bottom half of the dialog box, set the Mode option to Normal and make sure the Opacity option is set to 100%:
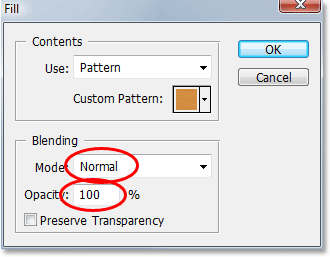
Photoshop Effects Set the"Blending Mode" to "Normal" and make sure "Opacity" is set to 100%.
Click OK to exit out of the dialog box. Photoshop will fill the entire layer with the wood texture, temporarily blocking the photo from view:

Photoshop Effects The new layer is now filled entirely with the wood texture.
We now have the wood for our frame. We'll make it look more like an actual frame and bring back our photo next.
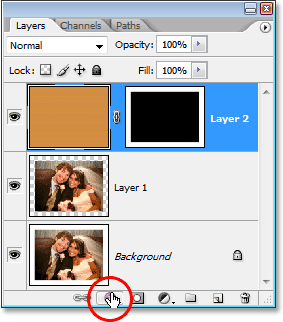
Step 5: Select The Photo On "Layer 1"
We're going to cut a hole in our wood pattern so we can see our photo once again, and to do that, we'll use a layer mask. Hold down your Ctrl (Win) / Command (Mac) key and click directly on the preview thumbnail for "Layer 1" in the Layers palette:
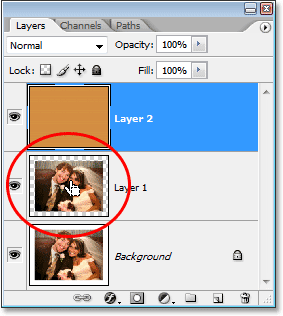
Photoshop Tutorial: Hold down "Ctrl" (Win) / "Command" (Mac) and click on the preview thumbnail for "Layer 1".
This loads a selection around the photo in the document window. We still can't see the photo itself, but we can see the selection box where the photo should be:
Photoshop Tutorial: A selection box around the photo appears in the document window.
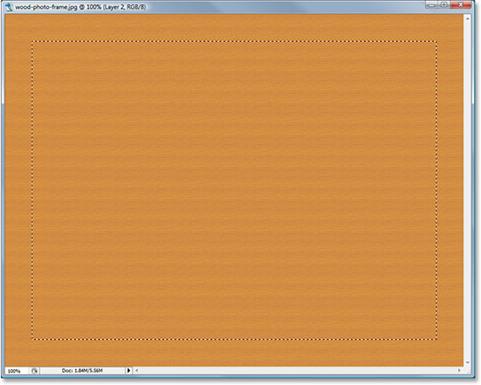
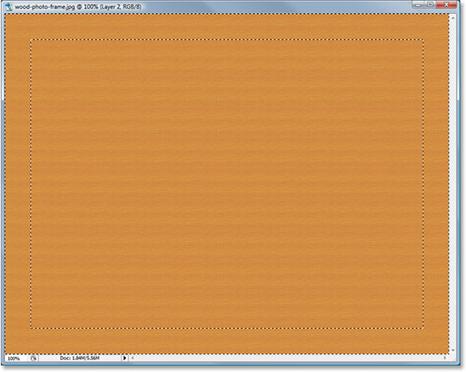
Step 6: Invert The Selection
We've selected the area where the photo should appear, but what we really need selected is the area around the photo (the frame), so we need to invert our selection. To do that, go up to the Select menu at the top of the screen and choose Inverse, or use the quick keyboard shortcut Shift+Ctrl+I (Win) / Shift+Command+I (Mac). Either way inverts the selection, and if you look closely in the document window, you'll still see the same selection box around the photo as before but now you'll also see a selection box around the edges of the document window, letting us know that we now have the frame area around the photo selected:
Photoshop Tutorial: The document window showing the frame area around the photo now selected.
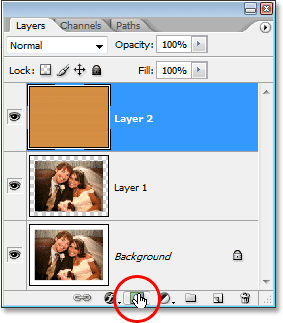
Step 7: Add A Layer Mask
Now that we have the frame area selected, click on the Layer Mask icon at the bottom of the Layers palette:
Photoshop Tutorial: Click on the "Layer Mask" icon at the bottom of the Layers palette.
This adds a layer mask to "Layer 2", and now the only part of the layer that remains visible in the document window is the area we had selected, which is the frame area around the photo. The part that was not selected - the area where the photo should appear - is now hidden from view, allowing us to see our photo once again:
Photoshop Tutorial: With the layer mask added to "Layer 2", the photo appears in the center of the frame.
If we look in our Layers palette, we can see that a layer mask thumbnail has been added to the right of the layer's preview thumbnail:
Photoshop Tutorial: A layer mask thumbnail now appears to the right of the preview thumbnail for "Layer 2".
We're going to give our picture frame some depth and change its color using some Layer Styles next.
Step 8: Deselect The Layer Mask And Select The Contents Of "Layer 2"
At the moment, our picture frame is looking a little flat. We need to give it some depth, and we can do that easily using Layer Styles, which we'll do in a moment. First though, we need to select the frame. Currently, we have the layer mask selected, not the layer itself. We can see which one we have selected by looking at the layer's thumbnails in the Layers palette. Whichever thumbnail has the white highlight box around it is the one that's selected. The layer mask thumbnail is currently showing the highlight box, which tells us that we have the layer mask selected. We need to have the contents of the layer (the frame) selected, so click on the layer's preview thumbnail to select the frame itself:
Photoshop Tutorial: Click on the preview thumbnail for "Layer 2" to select the contents of the layer and deselect the layer mask.
Step 9: Add A "Bevel and Emboss" Layer Style
With the frame itself now selected, click on the Layer Styles icon at the bottom of the Layers palette:
Photoshop Tutorial: Click on the "Layer Styles" icon at the bottom of the Layers palette.
Then select Bevel and Emboss from the list of layer styles that appears:
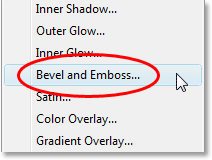
Photoshop Tutorial: Select the "Bevel and Emboss" layer style.
This brings up Photoshop's Layer Style dialog box set to the "Bevel and Emboss" options in the middle column. In the "Structure" section at the top, change the Technique option to Chisel Hard, then raise the Depth value to around 150%:
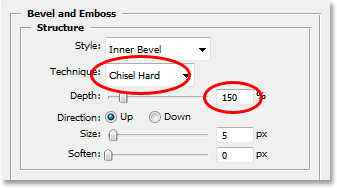
Photoshop Tutorial: Set the "Technique" option to "Chisel Hard" and increase the "Depth" to "150%" in the "Bevel and Emboss" options.
Then, in the "Shading" options at the bottom of the dialog box, lower the Opacity of the Highlight Mode down to about 50%, then lower the Opacity of the Shadow Mode to around 60%:
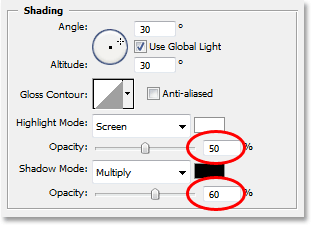
Photoshop Tutorial: Lower the "Opacity" of the "Highlight Mode" to 50% and the "Shadow Mode" to 60%.
This gives our frame more of a 3D look to it:

Photoshop Tutorial: The picture frame now has a three-dimensional appearance.
Step 10: Add A "Color Overlay" Layer Style
If you're happy with the color of the picture frame, you can skip this next step. If, like me, you'd prefer a darker color to the wood, here's how to change it. Click directly on the words Color Overlay on the left of the Layer Style dialog box. Make sure you click directly on the words themselves and not just inside the checkbox. Clicking inside the checkbox will turn on the Color Overlay layer style but it won't give us access to the options for it. We want the options, so click directly on the words themselves:
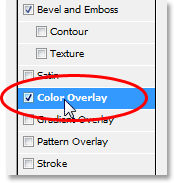
Photoshop Tutorial: Click directly on the words "Color Overlay" on the left of the Layer Style dialog box.
This changes the middle column of the Layer Style dialog box to the Color Overlay options. To change the color of the frame, click on the color swatch to the right of the Blend Mode options:
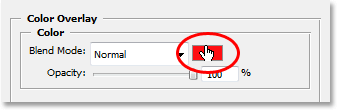
Photoshop Tutorial: Click directly on the color swatch to the right of the "Blend Mode" options.
This brings up Photoshop's Color Picker. I want to change my frame color to a darker brown, so I'll choose that color from the Color Picker:

Photoshop Tutorial: Choose the color you want your frame to be from the Color Picker. Here, I'm choosing a dark brown.
Click OK to exit out of the Color Picker. You'll see the new color applied to your frame, but the frame now appears as a solid color. We've lost the wood texture. To bring the wood texture back, change the Blend Mode of the Color Overlay to Color Burn:
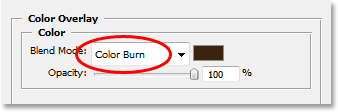
Photoshop Tutorial: To bring back the wood texture in the frame, change the "Blend Mode" of the Color Overlay layer style to "Color Burn".
Click OK to exit out of the Layer Style dialog box. Here's my frame after changing its color to a darker brown and setting the Blend Mode to "Color Burn":

Photoshop Tutorial: The color of the frame has now been changed to a dark brown.
We're almost done! We have one more simple layer style to add, and we'll do that next!
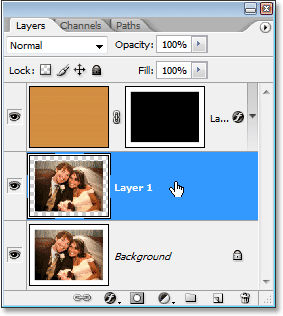
Step 11: Select "Layer 1"
We need to select our photo once again, so click on "Layer 1" in the Layers palette to select it:
Photoshop Effects Select "Layer 1" in the Layers palette.
Step 12: Add An "Inner Shadow" Layer Style
We're going to finish things off by adding a bit of a shadow to our photo, which is going to give the frame even more of a 3D look to it. With "Layer 1" selected, click once again on the Layer Style dialog box at the bottom of the Layers palette:
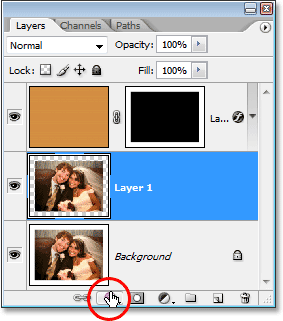
Photoshop Effects Click on the "Layer Style" icon at the bottom of the Layers palette.
This time, choose Inner Shadow from the list of layer styles that appears:
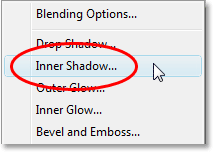
Photoshop Effects Choose "Inner Shadow" from the list of layer styles.
This brings up Photoshop's Layer Style dialog box once again, this time set to the "Inner Shadow" options in the middle column. All we need to do here is lower the Opacity of the shadow so it's not quite as intense. Lower the Opacity option down to around 65%:
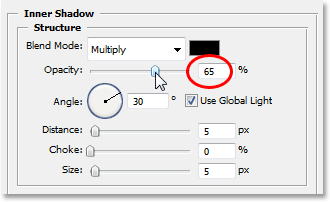
Photoshop Effects Lower the "Opacity" of the Inner Shadow down to around 65% to lower its intensity.
Click OK to exit out of the Layer Style dialog box, and we're done!
Here, after adding a a bit of a shadow to my photo, is my final wood picture frame:

Photoshop Effects The final result.
And there we have it!