
"Phototypography" or how to illustrate the picture with the text

This lesson well try to get an unusual
visual effect by creating selections with Color Range.
1. Open the file cat.jpg the basis of our work.

2. Make a copy of the backgrounds layer by choosing in the
menu Layer > Duplicate Layer. Our new layer may be called
B&W. Press OK.

3. Make a click on the B&W layer on the Layers panel
and select the next option from the menu: Image > Adjustments >
Black & White (Alt+Shift+Ctrl+B). Set the next sliders on the
indicated values.

4. Next we have to insert the text, using the "Filler text"
(the process of using filler text is sometimes called
[Greeking], although the text itself may be nonsense, or largely
Latin, as in
[Lorem ipsum]). Generating the text is possible by using the
generator from here:
[http://www.lipsum.com]
5. Select the Horizontal Type Tool (T) for
representing the bounding box coming from the left top corner of the
picture to the right lowest one, just to include the entire picture.
Insert in the bounding box the text that we have got by applying the
generator (Ctrl+V).
6. Now we need to format the text and that is why we need to
select in the menu Window > Character. Find in menu the
Arial font, setting also the parameters shown below:
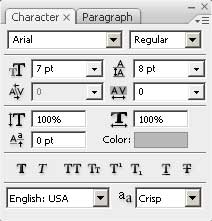
7. On the Character>Paragraph panel we have to align
the text to Left align. Apply the same method when aligning
the lines ends just not to have large intervals on the right side.
Well delete also empty lines out of the bounding box.

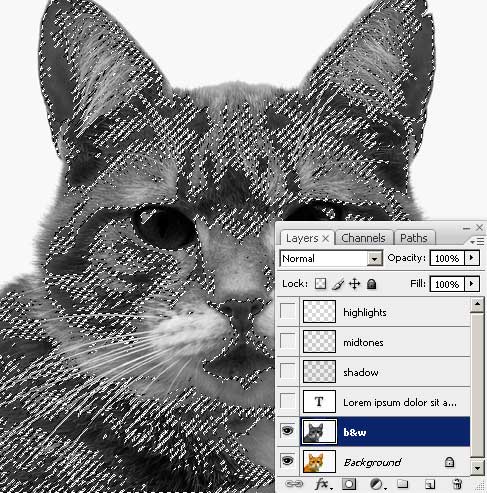
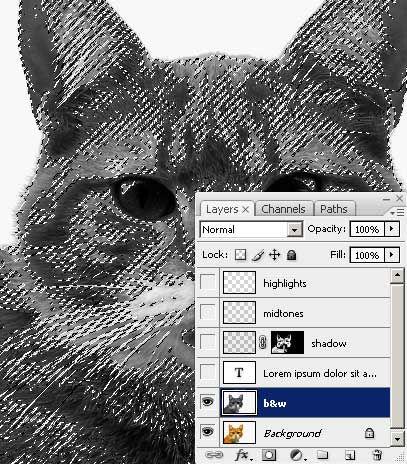
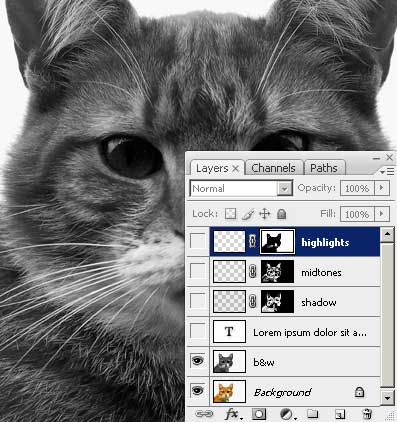
8. Make the texts layer active and choose in the menu three
times this option: Layer > Duplicate Layer. Now we have four
texts layers the basic one (hide it) and other three layers named
on the Layers panel: Highlights, Midtones and
Shadows.

9. Now we have to change the texts color on the Shadows
layer on black color (#000000), the Midtones text
on grey color (#B7B7B7) and Highlights text (#FFFFFF)
on the white one.
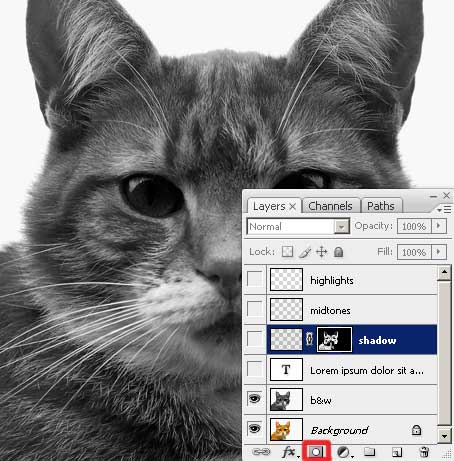
10. Select for each layer containing the text the next
indicated option in the menu: Layer > Rasterize > Туре. After
this operation the texts layer became a rasterized layer.
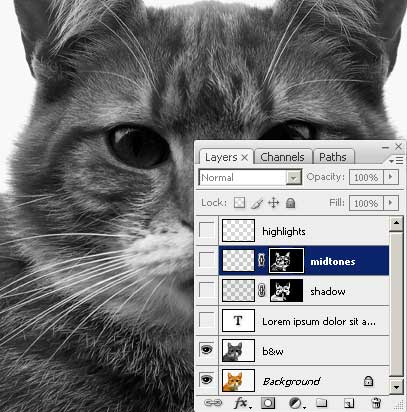
11. Next step includes hiding temporary all three layers with
the text. Choose on the Layer panel the layer named B&W.
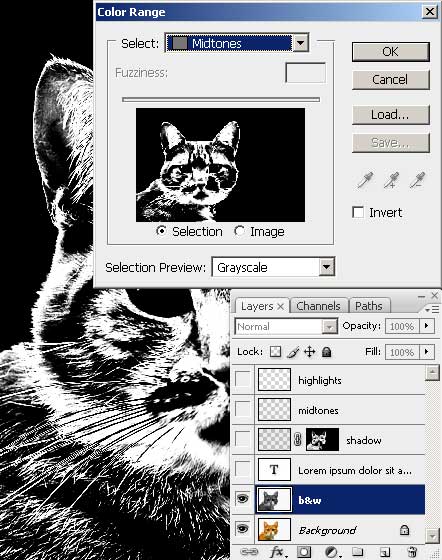
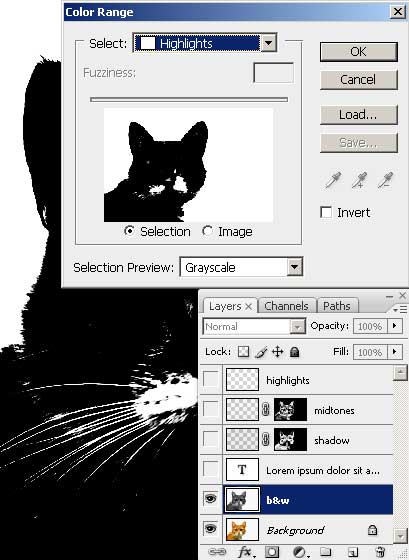
Select > Color Range. In dialog box we have to select in
Selection Preview menu option Grayscale and check
Selection. Choose also out of the Select menu option
Shadows.

12. In the preview window will disappear all the grey colors
gradations and the picture will become of two colors only black
and white. The white areas will mark out the black tones on the
photo that will be selected. Press OK and this zone will be
traced out on the black and white photo with a boundary line.
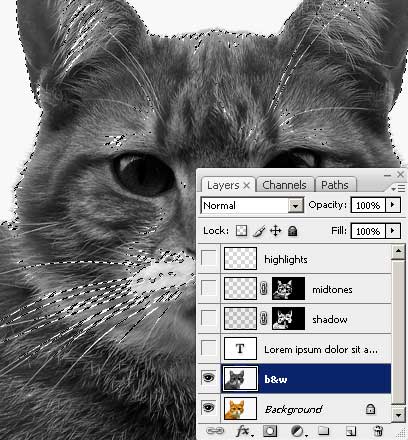
13. Make a click on the Shadows layer on the Layers
panel without deselect the selections, just for make the layer
active. Press on Add layer mask on the bottom of the panel.
Now when making the layer visible again, we may notice that it
contains the texts fragments, covering only black photos areas.
14. The operation should be repeated for
the Midtones and the Highlights layers, beginning with
the 11s step. Select Midtones and Highlights
from Color Range for corresponding layers. After finishing
this work we may make all three layers visible again, hiding the
basic layer and B&W layer to evaluate the result.
15. No we have a file containing three texts
layers and their masks. Make a right click on the mask near the
texts layers and select in the menu Apply Layer Mask.

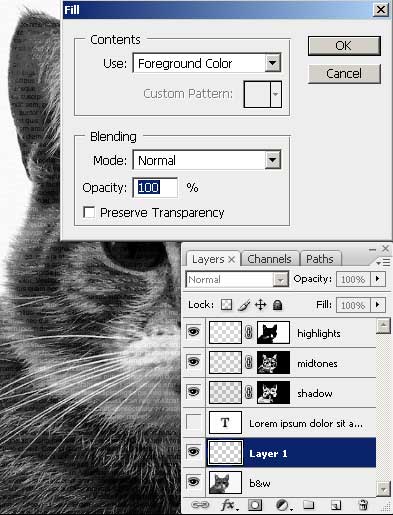
16. Create a new layer, Layer > New Layer, situated
upper than the already made one, named B&W. Set the next
color #6E6048 for the Foreground Color and select out
of the menu Edit > Fill. Select Use as Foreground Color.
Press OK to paint the layer with the chosen color. The B&W
layer, backgrounds layer and the basic texts layer
should be hidden.

As you may see weve got a text collage and we may not stop on this
result, but take different experiments with the colors. Try applying
for each layer different colors casts, using Image > Adjustments
> Hue/ Saturation option. 14. The operation should be
repeated for the Midtones and the Highlights layers,
beginning with the 11s step. Select Midtones and
Highlights from Color Range for corresponding layers.
After finishing this work we may make all three layers visible
again, hiding the basic layer and B&W layer to
evaluate the result.
15. No we have a file containing three texts
layers and their masks. Make a right click on the mask near the
texts layers and select in the menu Apply Layer Mask.
16. Create a new layer, Layer > New Layer, situated
upper than the already made one, named B&W. Set the next
color #6E6048 for the Foreground Color and select out
of the menu Edit > Fill. Select Use as Foreground Color.
Press OK to paint the layer with the chosen color. The B&W
layer, backgrounds layer and the basic texts layer
should be hidden.
As you may see weve got a text collage and we may not stop on this
result, but take different experiments with the colors. Try applying
for each layer different colors casts, using Image > Adjustments
> Hue/ Saturation option.