|
Photorealistic Puddles Photoshop Tutorial
Learn how to make photos more dramatic with calm puddles. In this
Photoshop tutorial, you will learn how to work with layers, transform
tools, and layer masks to create photorealistic puddles.
Step 1
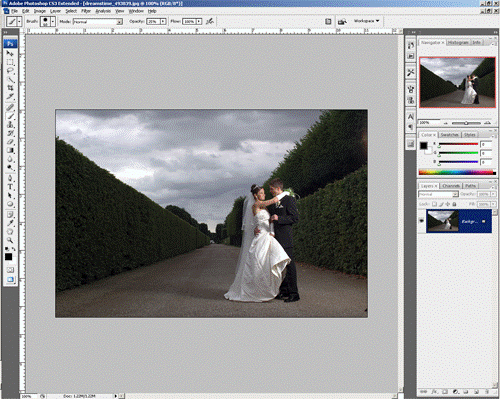
Open an image that you would like to add puddles to. Of course, the
picture needs to have to have a floor.
Step 2
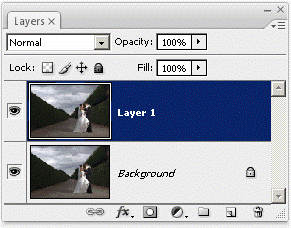
First, we'll need to create a duplicate of the layer. This layer will
be used to apply the puddles and reflections.
Step 3
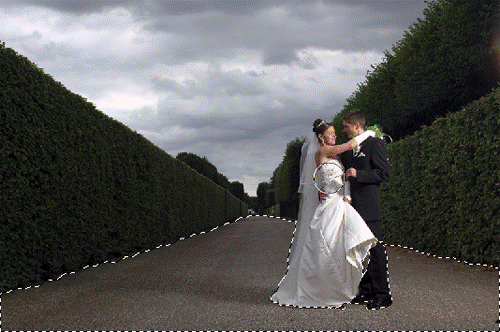
Create a selection of the floor. If you are using Photoshop CS3, you
can use the quick selection tool to quickly create the selection.
Otherwise, you can use the magic wand, magnetic lasso, or other
selection tools.
Step 4
In the Layers palette, click on the add layer mask button. You should
now have a layer mask with the shape of the floor as the white areas in
the mask. If you got it backwards (shape of floor is black), you can
choose Image > Adjustments > Invert to invert the layer mask.
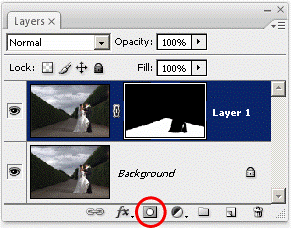
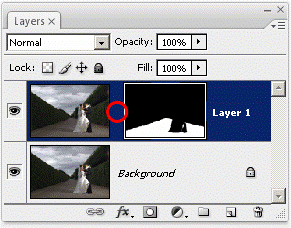
Now unlink the layer with the layer mask. To do this, click on the  button
beside the layer thumbnail and the layer mask thumbnail. button
beside the layer thumbnail and the layer mask thumbnail.
Step 5
Now we'll create a reflection on the floor. This is a very simple
trick and will make the floor look like a mirror. Currently, you should
have the layer mask selected. Click on the layer thumbnail in the layer
mask to select the layer (and not its layer mask).
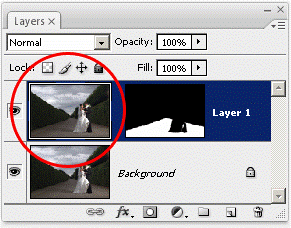
Choose Edit > Transform > Flip Vertical. Your floor should have an
effect like the image below.
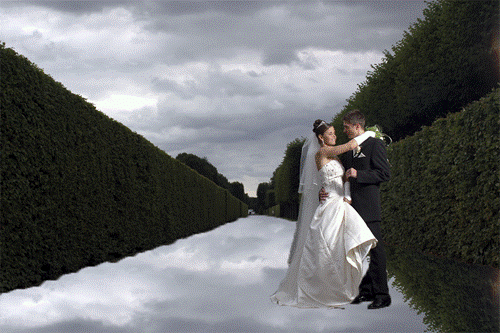
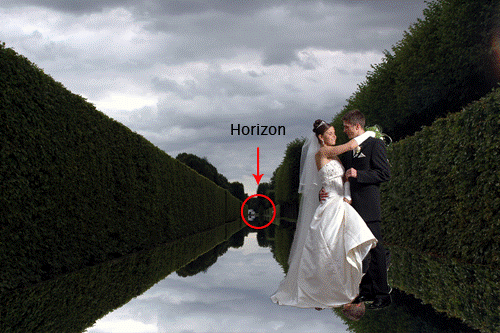
The floor looks a little bit awkward because it isn't aligned
properly. To fix this, choose the move tool from the tool bar and move
the layer so that the horizon of the current layer meets the horizon of
the original image.
Step 6
We got the mirror floor, but there seems to be a problem with the
reflection of the bride and groom. To fix this, we'll create a separate
reflection for them.
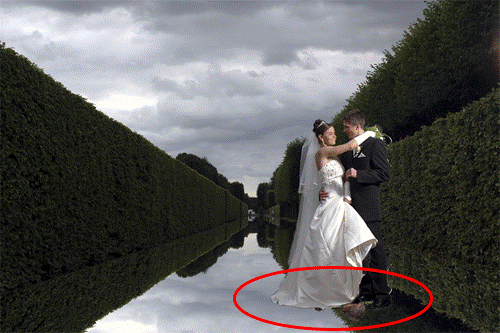
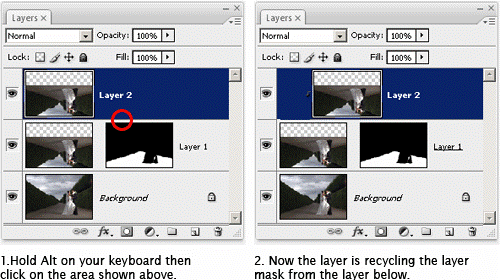
First, press Ctrl+J to duplicate the layer. It should only duplicate
the layer without the layer mask. If you get another layer with another
layer mask, click on the new layer mask then click the trash button in
the layers palette to delete it. With the new layer selected, hold the
Alt key on your keyboard and click between the top two layers. This will
create a clipping mask. A clipping mask uses the layer below as the
layer mask.
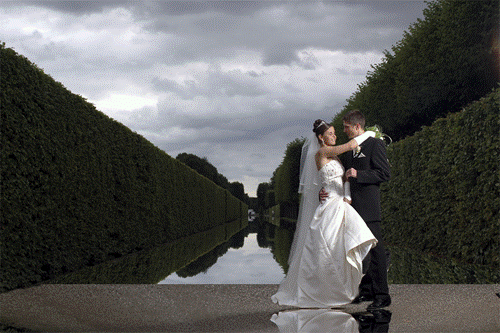
With the top layer selected, choose the move tool from the toolbar
and position the layer so that the reflection matches the foreground
objects. In the image below, the layer was positioned so that the bottom
of the bride and groom in the two layers meet.
Step 7
Use one of the selection tools, such as the quick selection tool, to
create a selection of the object's reflection.
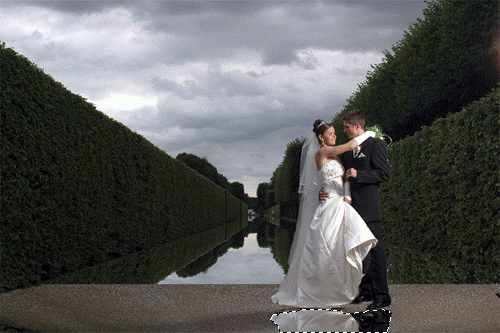
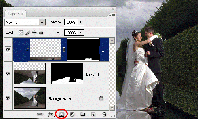
Click on the add layer mask button and you should now get a proper
reflection like the image below.
Step 8
Now we'll need to create a mask for both the layers. You can only add
one raster layer mask per layer, but here's a trick to add more than one
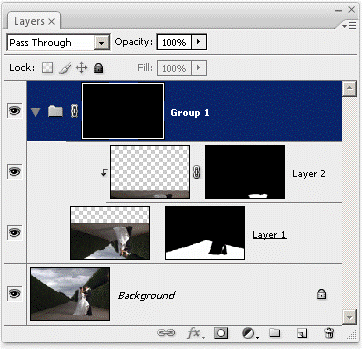
layer mask. First, select Layer 1 and choose Layer > Group Layers. This
will put the layers inside a folder. Now, select the group and choose
Layer > Layer Mask > Hide All. Now you have another layer mask. Your
layers should look similar to the image below.
Step 9
Your image should look like the original image without any puddles.
In the Layers palette, click on the group layer mask to select it. Now
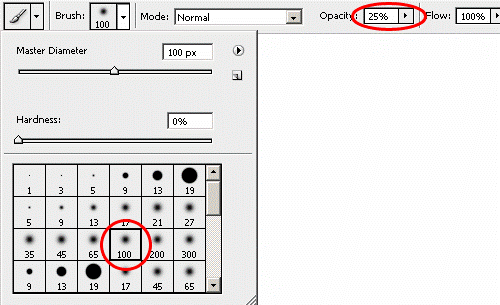
we'll start painting the puddles. Select the brush tool from the tools
palette. First, select any soft round brush with a hardness of 0% (you
can change the brush size later). Then, change the opacity to 25%.
Paint the puddles on the floor. Basically, anywhere that you paint,
the puddle will appear. If you make a mistake, you can always press
Ctrl+Z to undo.
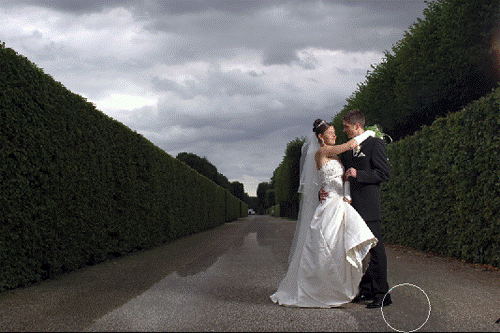
If you want to add more depth to the puddles, continue painting
additional layers until you get the results that you desire.
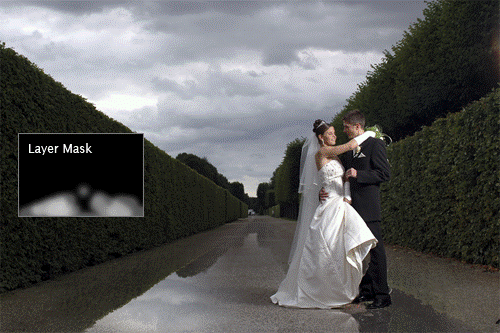
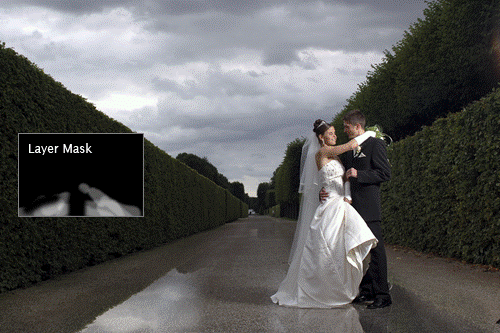
You can also switch to the eraser tool to erase the areas that you
want to remove the puddles from. For example, in the image below, I
erased the middle and left areas to make the puddle not seem so large.
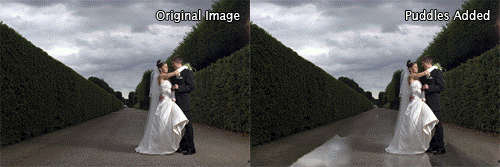
Final Results
|
