Create a Painted Rock Wall
by : Shadorma

step 1
In this tutorial, we will be using a Displacement
Map filter to paint a mountain scene on a rock wall.
The first step is to create the displacement map. A displacement map
'maps' the shadows and highlights of an uneven surface and applies
that 'map' to the image painted on the wall. This creates the
illusion of depth, of paint disappearing into the cracks and
shadows. Very realistic effect, and easy.
Find an uneven, cracked, or otherwise marred surface to paint your
image on.
I picked a fairly even surfaced rock wall, with good contrast
between light and dark.
Some ideas are brick walls, sidewalks, storefronts, windows,
vehicles, faces.... anything that can have an image warped over it
should be okay to use.
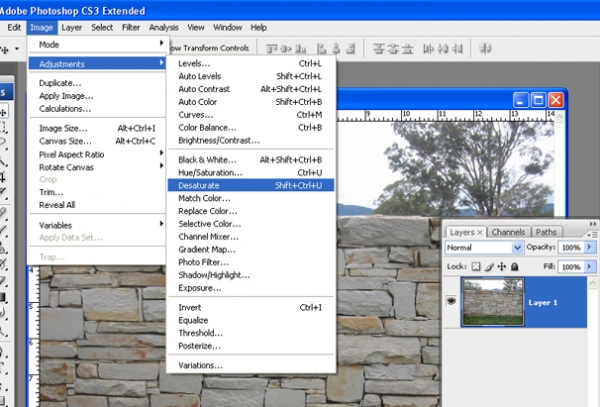
When you find that perfect photo, leave it rgb and go to
adjustments, desaturate.
After desaturate, I find it helpful to up the contrast almost to the
point of too much. Remember, it's only going to be used as a pattern
for the image to warp around. The shadows in the displacement map
image are the key to distortion, so need to have high contrast. If
you do not have enough contrast and try to use the image as a
displacement map, it won't even recognize it properly. In that case,
simply open the displacement file and up the contrast. Let's move
on....
step 2
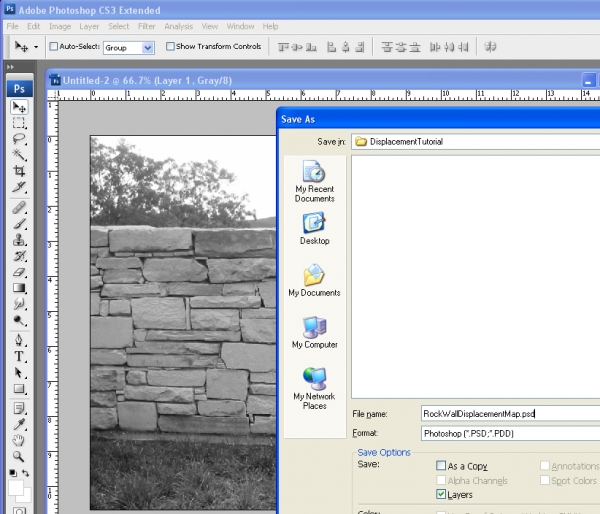
Save your displacement map with 'displace' in the
name, and make sure it's in psd format.
Close your file. Open the original color version in a new document.
step 3
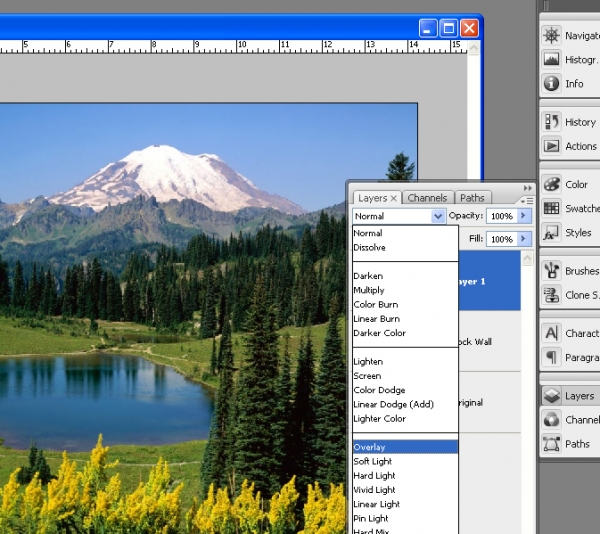
Now find your image to be painted. I chose a
mountain scene.
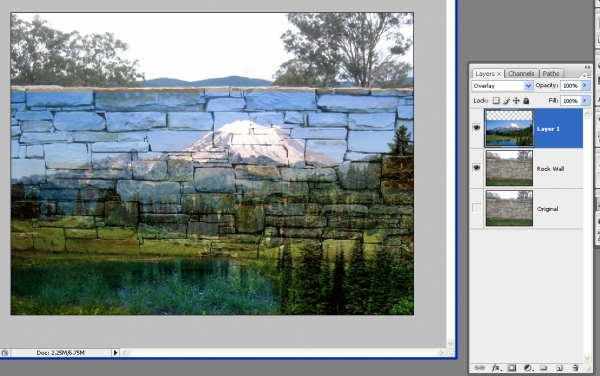
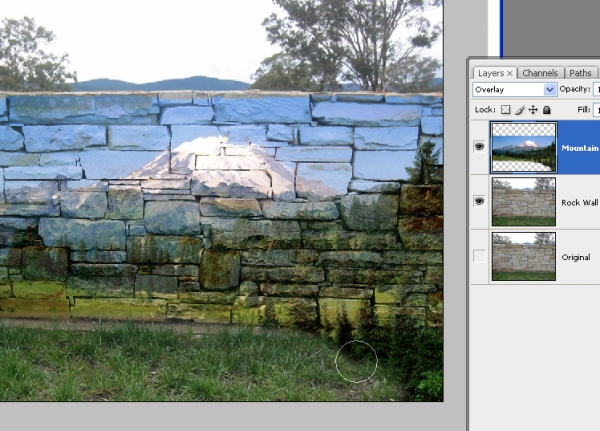
Put it on a new layer.
Make the new layer Overlay.
step 4
Position your image exactly where you want it. You may adjust the layer transparency if you feel the image is too brightly 'painted.'
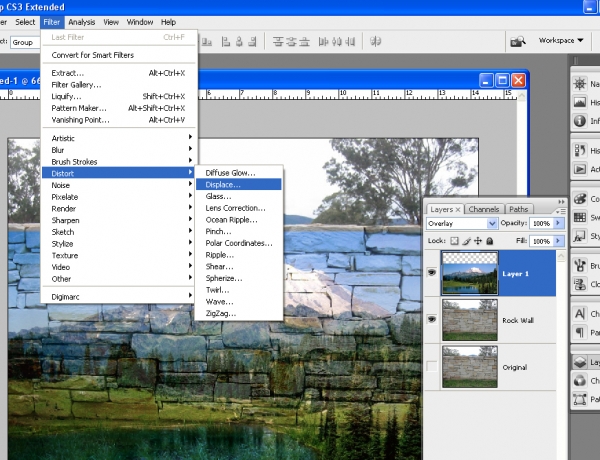
step 5
Time for the displacement filter!
Make sure you are on the painted image layer and go to filter,
distort, displace.
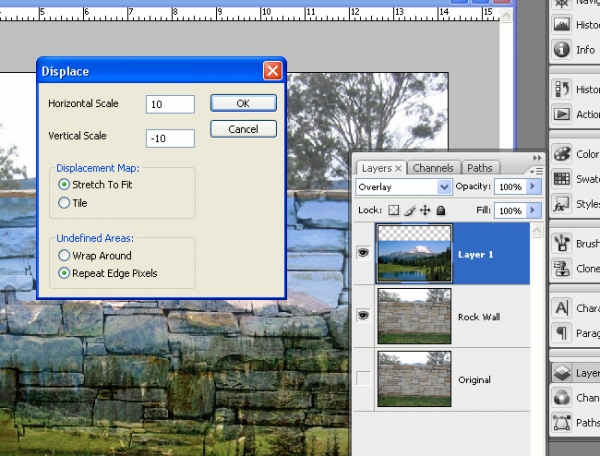
step 6
Displacement settings I used were :
Horizontal: 10
Vertical: -10
You may play with these to see what you like.
Things look best when Stretch Image and Repeat Edge Pixels are
selected.
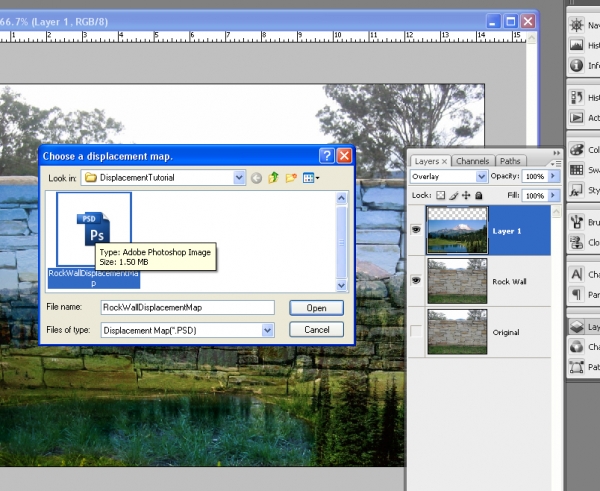
step 7
Now we find the displacement file we created
earlier. So, go find it. Hit open. You should notice some
distortion, lined up with the curves and cracks of your surface.
If you didn't get enough distortion in your image, try opening the
displacement image and adjusting the contrast up, so the shadows get
darker.
step 8
Erase any extra parts of the image.
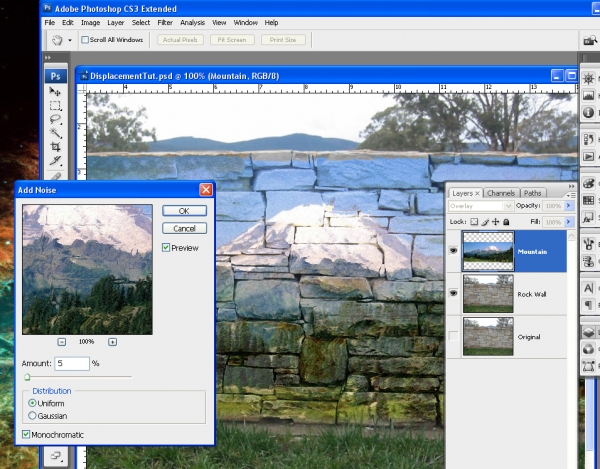
step 9
We should add a little noise, just for some
texture.
There are other ways to add texture, and you may need more or less
texture depending on your surface.
My surface was pretty smooth so chose Filter, Noise, Add Noise and
adjusted it to my satisfaction.

step 10
Adjust your noise levels to whatever looks authentic to you. Your image may not even need a texture added.
step 11
At this time we're pretty much done. I've selected
the sky portion of my image and faded it a bit. It was just a little
too bright.
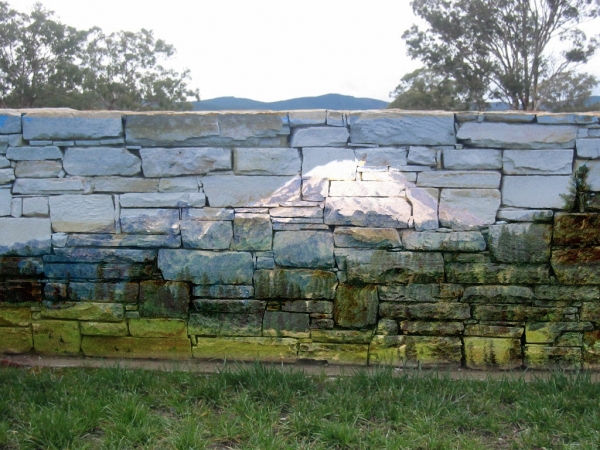
And that's it! We've just painted a mountain onto a rock wall and
didn't get paint all over the grass!