
The century drawing

Everything will work best with architectural images. Open your favourite architectural image, here I use this one.

Double click the background layer named it Layer 0 to unlock it.
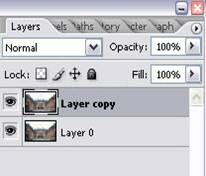
Duplicate the Layer 0 by use Ctrl + J or right-click in the layer and chose Duplicate layer.
The new layer named Layer copy.
Step 2:
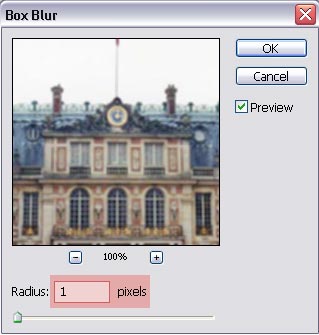
While the copy layer selected. Go to Filter > Blur > Box blur

Now we have:

Step 3:
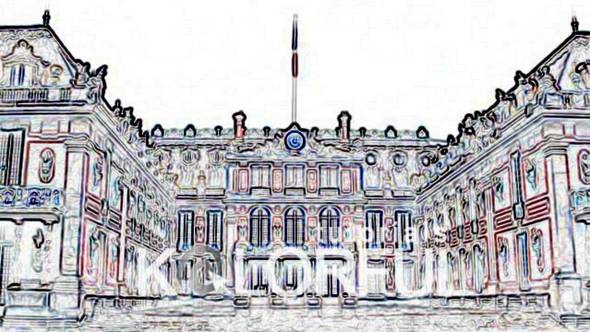
Outline this layer by go to this special filter Filter > Stylize > Find Edges

The picture look like:
Step 4:
An old architectural drawing be creat by a black pen is better, isnt it?
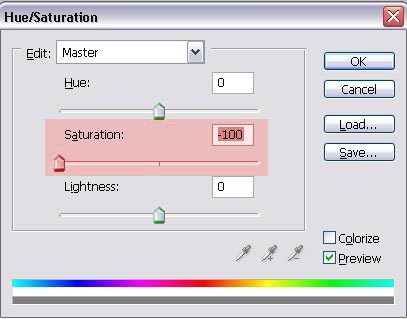
So, still select the copy layer. Using Ctrl + U to change the edges color to black all like below.
Do the same with the layer 0.
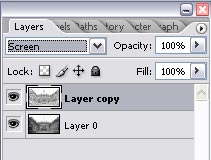
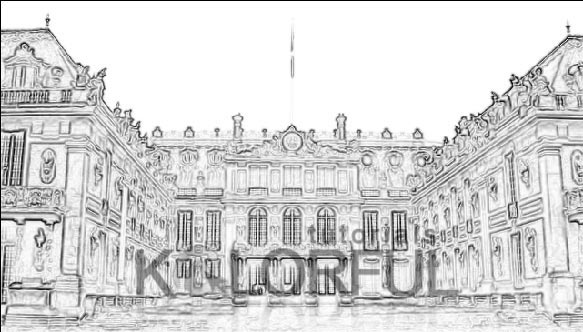
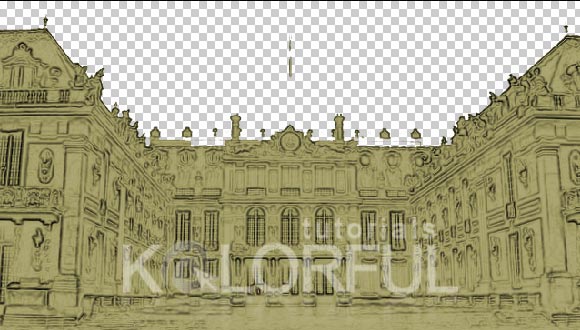
Step 5:
Change the copy layer mode to Screen.
The picture now look like:
Step 6:
Ctrl + Shift + E to merge down the 2 layers or select them, right - click and chose Merge Layers.
Now we have only one layer.
Using any selection tool to select the white sky at the top of the picture, then delete it.
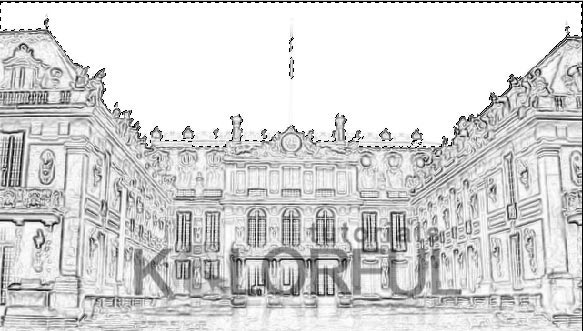
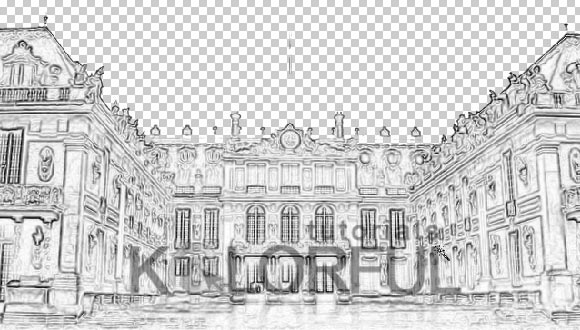
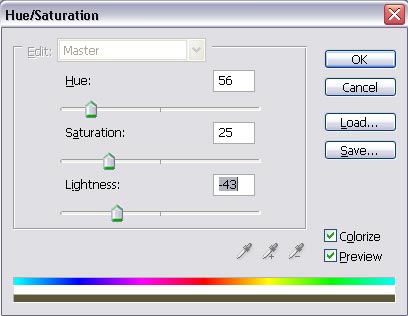
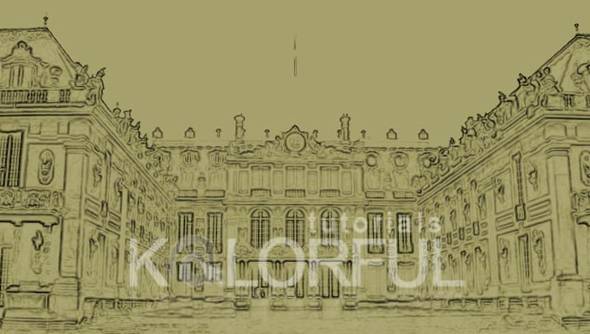
Step 7:
Setting the Hue/ Saturation (Ctrl + U) like below:
We will have this.
Creat a new layer, bring it under the Layer copy.
Using the eyedropper ![]() to
pick up the old color then color the new layer with that color.
to
pick up the old color then color the new layer with that color.
So, here is it.
Step 8:
Creat a new layer, bring it to top of the layer pallete.
Using some Old Brushes here to make the picture more obsolete like this
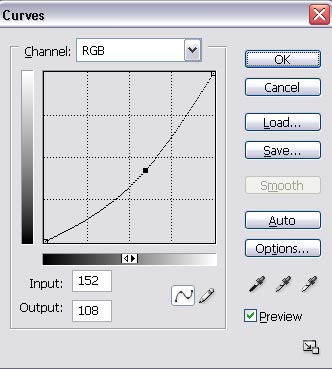
Then use Curve (Ctrl + M) to make it darker.
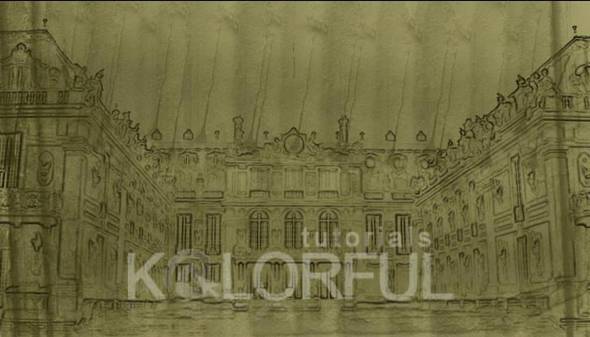
Step 9:
More?
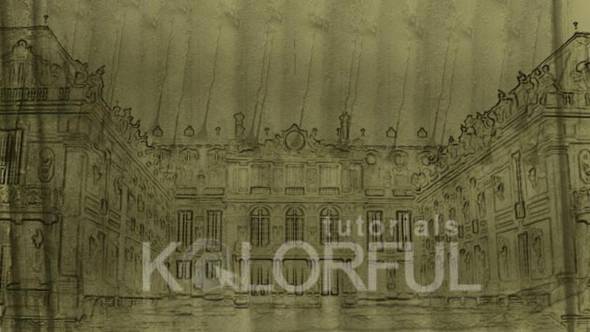
Merge layers (Ctrl + Shift + E) into only one layer.
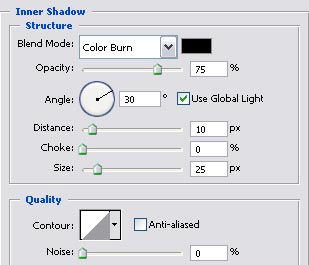
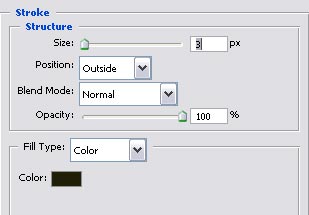
Right-click in that new layer, chose Blending Options or Layer > Layer Style
In the Layer Style pallete, set the Inner Shadow and Stroke Options like below.
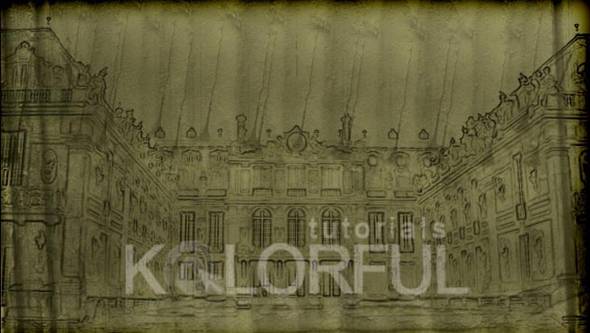
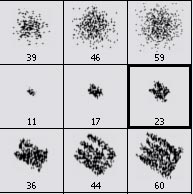
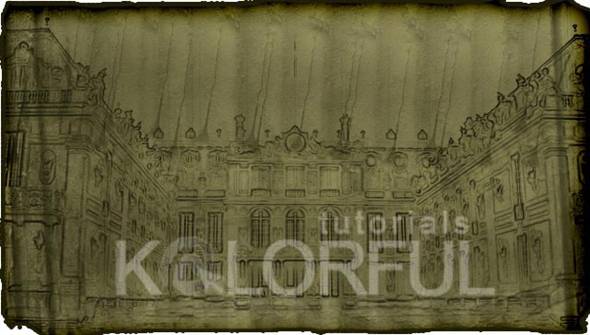
Step 10: The last step we will make some burn around the picture...
Using Eraser tool ![]()
Open the Brush pallet (F5) then chose Chalk 23 pixels brush
Then drag the brush around the borders of the picture.
Finally, we have this...
source : www.tutorialize.com