Adaptive Contrast (page 2/2)
written by : Denny Tang

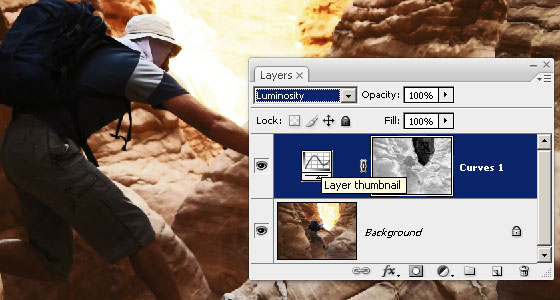
Step 6: Change the blending mode to luminosity
Your image should look more saturated than it was before. If you don't like the increased saturation, change the blending mode of the Curves adjustment layer to Luminosity and the saturation will return to normal.
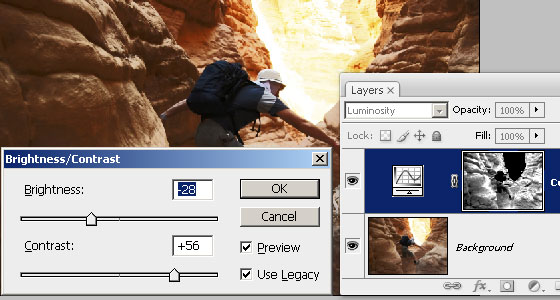
Step 7: Adjust the layer mask
Now we're going to work on the layer mask and adjust where we want the contrast to be applied and where not. Select the layer mask then choose Image > Adjustments > Brightness/Contrast. If you are using Photoshop CS3, check the "Use Legacy" option. While looking at the photo and layer mask, adjust the brightness and contrast settings. The brightness settings will adjust the overall visibility of the contrast. The contrast setting will adjust the compression between the shadows/highlights and midtones.
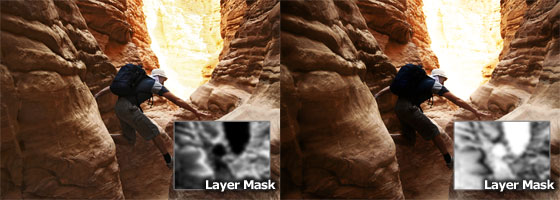
Step 8: Blur the layer mask
Finally, we'll blur the layer mask. This will produce results similar to enhancing local contrast. Choose Filter > Blur > Gaussian Blur. As you increase the radius, the contrast between the edges will increase.

Step 9: Invert the layer mask (optional)
Depending on the results that you desire, you may also invert the layer mask so that contrast is applied to the shadows and highlights but not the midtones. To invert the layer mask, choose Image > Adjustments > Invert.
Layer mask not inverted
· This works well with landscape photos and can produce results that look slightly like HDR tone mapped images. Preserves detail in the highlights and shadows. Only the midtones will have its contrast enhanced.
Layer mask inverted
· This works well with portraits and certain landscapes. With portraits, you generally want to preserve the details of the skin tones which usually is in the mid tones. With the layer mask inverted, the image appear to have more contrast without affecting the midtones.
Final Results
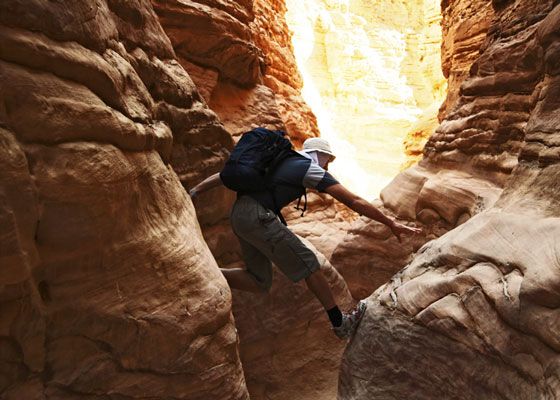
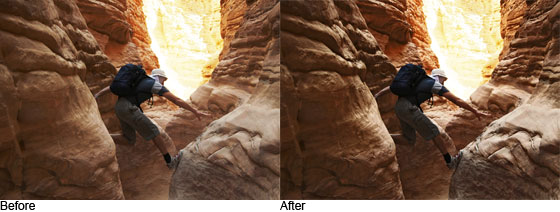
Here is a comparison of the original photo and the photo with this adaptive contrast tutorial applied. The image now has higher contrast without blowing out the shadows on the hiker's backpack and the highlights in the distance.
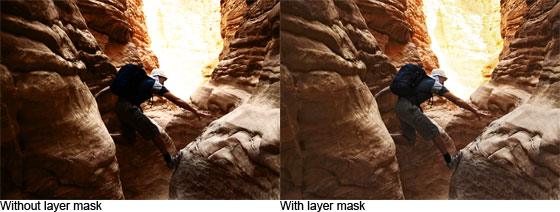
Below is a comparison between increasing contrast normally and using this adaptive contrast technique. Without the layer mask, the shadows and highlights are blown out.
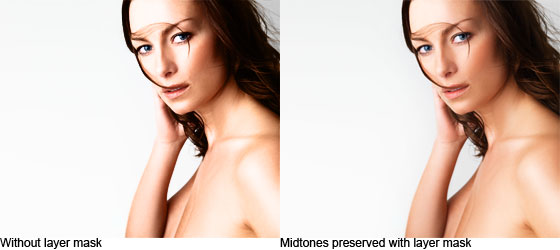
Below are examples of the adaptive contrast effect with an inverted layer mask applied to a portrait. The layer mask is inverted because we want to preserve the skin tones. That way, the contrast is only increased in the highlights and shadows.
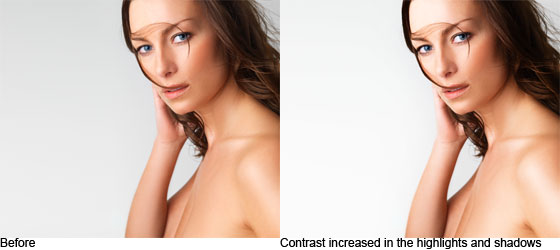
Below is a comparison between the contrast enhancement with and without a layer mask. The image on the left shows how the image would look like without a layer mask. The image on the right shows the same contrast but with the adaptive contrast technique applied. The contrast is increased only in the hair and the highlights of the skin; the midtones in the skin are preserved to keep it looking natural.